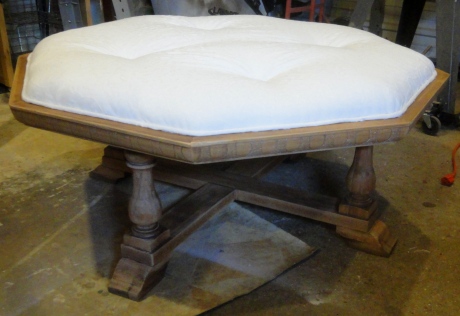
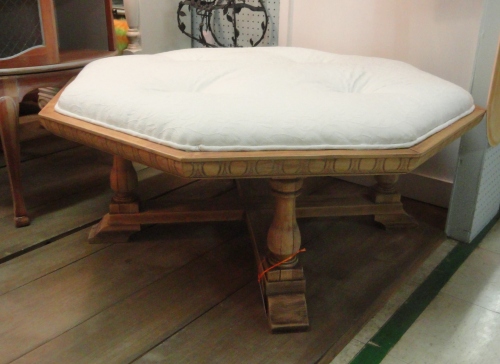
O m g …a finished project!
It’s been a w h i l e !
The stress and pressure of a first REAL project was taking a toll on my finger, so day 2 was a “rest” day to deal with the swelling and aching.
 –
–
–
AND~day 2 happened to be my birthday. Family took me out for Mexican & margaritas ~for medicinal purposes! ; D
–
–
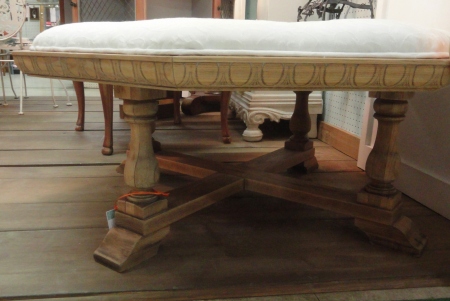
Day 1– I shared that I stripped, sanded, and waxed the wood base. And before the day was out, I applied the padding and batting.
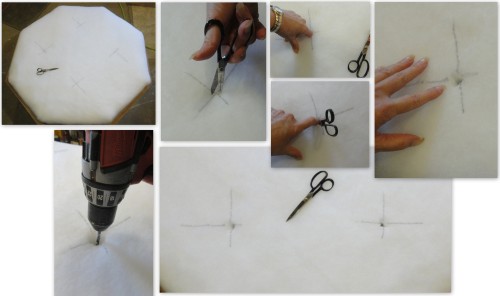
Day 3– I worked on the upholstery. But first there was a bit of prepping for the 4 button tufts.
◊ I marked out the locations,
◊ and cut slits all the way down to the wood decking…
◊ then drilled a hole completely through that decking.
I positioned the fabric and started working on the tufts.
◊ I used welting cord tied in a pretty top knot for the temp “finish” because none of the 3 stores I chased to currently had upholstery-grade covered buttons. I’ll hot glue a covered button over it later.
◊ Because I was using a thick medium, I used wire to pull the cord through the holes. Think of it like a flexible sewing needle.
1st, I poked the wire through the fabric to pull the cord through.
Then I poked the wire up through the wood decking and padding from underneath—caught the cord and pulled it down through the layers.
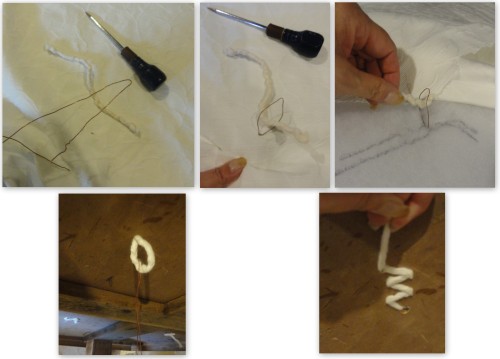
Once you pull the cord through to the under side,
you’ll need to pull it down and taut,
-adjusting & smoothing the top side to look how you want-
then staple the cord back and forth in a zig-zag fashion to keep it from letting go.
Make sense?
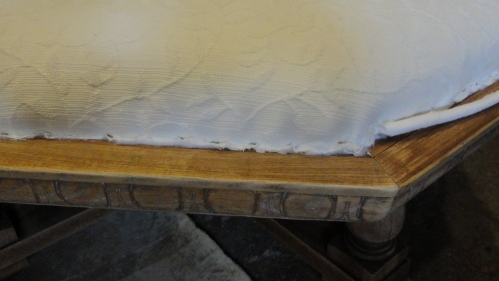
With the tufts in place, I worked on stapling down the fabric at each of the corners, pulling and smoothing, then stapling down the rest. *I use a pneumatic staple gun—it makes a HUGE difference in a job!
The last task was to run almost 12ft of single welting to cover over the raw, stapled edges. Btw~this ottoman is really comfy to sit on!
I’ve already taken it to the antique mall ’cause — I need to clear the decks for A Dresser Project!
I WiLL have to pace myself + I have another Dr assessment Friday.
But baby~I’m staging my comeback!
Catherine
I’m sharing this project at


Very nice! I wouldn’t mind that in my living room! Good luck with your finger…
LikeLike
Me too Patty- but “you” can’t have everything so it’s up for sale. : /
LikeLike
Happy belated Birthday! Love the table ottoman!! Great style!
LikeLike
happy belated birthday!
you’ve done a super job on that ottoman. I’m not sure how you worked through all of that with your bad finger!
I hope the assessment is great news!
gail
LikeLike
Thank You Gail!
LikeLike
I’m really glad I came across this. I’m considering an ottoman in my future and was wondering just how to go about that whole button tuft thing. Thanks!
LikeLike
I have a headboard and bench to reupholstered with tufting, your post is very inspirational as you make it look so easy, Wonderful job and happy belated birthday!
LikeLike
I love your creativity. Turned out great! Thank you for linking up to Talk of the Town.
Julie @ Love My Simple Home
LikeLike
How fun! I love the size of this, perfect for pulling chairs up to and everyone resting their feet while chatting away.
LikeLike